Saturday, November 24, 2012

Thanksgiving 2012: A Recap

I'm sitting at home wrapped in a blanket, sipping a cup of tea and enjoying my new wood wick candle I got today and I feel completely at ease. The past few days have been extremely busy- Thanksgiving dinner, lots of driving and even some holiday shopping and a movie. I feel like I've been going nonstop for two weeks; I need to just sit and relax and do some writing.

Just part of our dining room table...
Aaron prepping the relish tray.
This Thanksgiving was not like any other. For the very first time my parents and my husbands parents enjoyed Thanksgiving dinner together (of course, Aaron and I were there too!) Typically my Mom makes the traditional turkey dinner and we make the hour and a half journey home to spend the day with them. Aaron's family usually gathers together in Pennsylvania at his sister's house..some years we've even joined them there, or had to split our day... dinner at my parents then another at his. It gets quite crazy sometimes. However, this year both families dined together...and boy did we have a feast! Aaron's sister, his mother and I did the cooking and we made enough to feed an army. We had everything- turkey, stuffing, vegetables, pies, fruit salads, breads, wine, cocktails etc...It was quite an incredible sight, and boy did we all want a nap afterwards!

The "kids" table...for the 23-26 year olds, including myself!
Last year, Thanksgiving was a pretty rough- I was in a bad place emotionally and that night on our way home Aaron and I hit a deer with my car (there was minimal damage, and the deer walked away unharmed...I think)... so I was looking forward to having a nice day with my family sans deer. I'm so fortunate to have parents that take an initiative to get to know my in-laws, and vice versa. It's great to be able to have both families come together to celebrate the holidays..it means less time split between houses and more time for Aaron and I to enjoy our families under one roof. I'm also very fortunate to have in laws that welcome my last minute guests to dinner- whether it was our weekly Wednesday night dinner back when Aaron and I were still in high school, or Thanksgiving- my friends have always had a spot at their table and are welcomed.

Needless to say, this year, I am very thankful for all that I have. 2012 hasn't been the best year for my family, my friends or myself...but regardless of the things we've had to go through this year, we've stuck together. Lots of people did the "I'm thankful for..." thing on Facebook this month and I just haven't had the time to sit and think about posting every day...so here's my list: I'm thankful for those that have remained close to me, that have encouraged me to stay strong, helped me through difficult times and decisions, and remained willing to sit and just listen to me rant and rave when my emotions get too high. I'm thankful for a caring and compassionate husband who never fails to make me smile at least once a day, despite how low I may feel...and for my best friends Brittni and Candi, who love me for who I am and encourage me day after day to be true to myself. I'm thankful for a family that loves me unconditionally; parents who still provide me with a voice of reason when I'm in need of one, and a brother who, despite the odds, continues to be the strongest person I know, and who inspires me to overcome the obstacles that stand in my way. I'm thankful for my cat (yes..my cat.) because nothing else in this world calms me like she does, or comforts me in my darkest moments like she can; she keeps me sane when everything else fails. I'm anxiously awaiting the beginning of the New Year; a chance to start over, to finish what I've started (yes, that means my Thesis) and to begin a new chapter of life.

Oh, I almost forgot! We had this amazing butternut squash dish at dinner- Here's the recipe!! Try it- it's amazing and I'll be making it again soon because I'm already craving it! :)

Parmesan-Butternut Squash Gratin


Ingredients:

1 butternut squash (2 1/2 lb)
1/4 cup butter
2 large cloves garlic, finely chopped
1/4 cup panko bread crumbs
1/3 cup grated Parmesan cheese
1/4 teaspoon salt
1/8 teaspoon pepper
1/4 cup chopped fresh parsley 
 

Directions:

  • Heat oven to 375°F. Spray 13x9-inch glass baking dish with cooking spray. Peel, halve lengthwise and seed squash; cut into 1/2-inch-thick slices. Arrange with slices overlapping slightly in bottom of baking dish.
  • In 2-quart saucepan, melt butter over medium heat. Reduce heat to low. Add garlic; cook 2 to 3 minutes, stirring frequently, until garlic is soft and butter is infused with garlic flavor. Do not let butter brown. 
  • In small bowl, mix bread crumbs, cheese and 1 tablespoon of the butter-garlic mixture. 
  •  Brush squash slices with remaining butter-garlic mixture. Sprinkle with salt, pepper and bread crumb mixture.
  • Bake uncovered 30 to 40 minutes or until squash is tender when pierced with fork. Increase oven temperature to 425°F; bake 5 to 10 minutes longer or until lightly browned. Before serving, sprinkle parsley over top. 
  •  

    Monday, November 19, 2012

    Slow Cooked Beef Minestrone Soup- My Favorite!!

    Since it has been getting colder and colder outside I decided that its time to post the recipe for my favorite Crock-Pot meal ever: Slow-Cooked Beef Minestrone Soup. I stumbled across this in a Wegmans magazine last fall ( I know, you're shocked I didn't find it on Pinterest!) and I've been in love with it ever since. It's so easy and tastes amazing. I've even been able to convince my mom to make it a couple of times and she enjoyed it as well (for those of you who know her, you know that she's not one to change her dinner routine/menu that quickly...so since she's added this to the rotation you know it's good!).

    Crock-Pot meals are my favorite. I'm pretty sure that next to sliced bread, the Crock-Pot was one of the greatest inventions of all time. It's the perfect kitchen gadget! No other kitchen gadget allows you to put everything in one pot and forget about it for 6 hours. Seriously, genius.

    Now, keep in mind this is a Wegmans recipe, so everything on their ingredients list is a Wegmans brand. There isn't a law out there that says you have to buy the Wegman's Italian Classics or their prepackaged vegetables...there are other easy and delicious substitutes out there. The only reason I buy this brand is for convenience; when I prep a Crock-Pot meal its usually on a day that neither my husband nor I are going to be home and I have little to no time in the morning to dice and chop vegetables, let alone pan sear the meat (maybe if I got my butt out of bed earlier before work this wouldn't be an issue..but oh well!). It's a personal preference and you can't mess this recipe up- use what you want!

    So here you go, here's the list of ingredients and the directions:

    Slow Cooked Beef Minestrone Soup:


    Ingredients:


    1 pkg (about 1.6 lbs) Boneless Beef Chuck Roast, cut into 1-inch cubes
    Wegmans Pan Searing Flour
    2 Tbsp Wegmans Pure Olive Oil
    1 pkg(16 oz) Food You Feel Good About Cleaned & Cut Minestrone Soup Vegetables*
    Salt and pepper
    1 carton (32 oz) Food You Feel Good About Beef Culinary Stock
    1 can (14.5 oz) Wegmans Italian-Style Diced Tomatoes
    1 pkg (24 oz)Italian Classics Seasoned Tomato Sauce (Prepared Foods)
    1/2 cup dry Italian Classics Ditalini Soup Pasta
    1 can (15.5 oz) Italian Classics Garbanzo Beans, drained and rinsed**
    1 pkg (5 oz) Food You Feel Good About Baby Spinach 


    *Minestrone Vegetables include: Potatoes, zucchini, leeks, carrots, celery, onions & cabbage- if you choose to chop your own fresh vegetables.
    ** I omit the beans- just not my thing.


    Directions: (seriously, just 6 easy steps!)


    1. Coat beef with pan-searing flour; pat off excess.
       
    2. Heat oil in large braising pan on MEDIUM-HIGH until oil faintly smokes. Add beef; sear 10 min until all sides are brown.
    3. Place beef in slow cooker; don't discard pan drippings. Add vegetables to pan with beef drippings; season with salt and pepper. Cook, stirring, 3 min; add to slow cooker.
    4. Add stock, tomatoes, and sauce to slow cooker. Cover, cook 4 1/2-6 hours on HIGH or 8-10 hours on LOW.
        
    5. Add dry pasta and beans 30 minutes before end of cooking on HIGH (45 minutes before end of cooking on LOW).
    6. Add spinach to slow cooker; stir to blend well. Allow spinach to lightly wilt, about 2 min. 
    That's it! This meal will make your house smell amazing and your mouth will be watering all afternoon while you anxiously await dinner! Don't forget to add some Italian Bread on the side to dip- you can't have soup without bread! 

    Monday, October 22, 2012

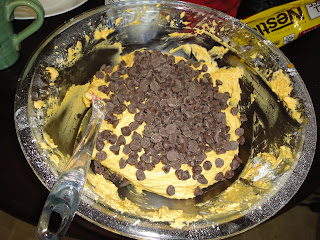
    Pumpkin Chocolate Chip Cookies

    WOW- It's been over a month since I've last posted! Have no fear, I'm back with my absolute favorite cookie recipe!

    This recipe is fairly new to my family; my mom stumbled across it about 5 years ago in her local newspaper and it's been one that we have continued to make every fall ever since. I remember the first time she made them and how impressed I was- before then I wanted nothing to do with anything made from pumpkin. I have never liked pumpkin pie (I'm more of an apple pie sort of gal) but after tasting these my world was turned upside down. Now I love pumpkin in pretty much anything- my new obsession is Bailey's pumpkin coffee creamer..and I've recently discovered the wonder that is pumpkin fudge. I currently work at a place where we make homemade fudge weekly and I've probably gained 5 pounds from all of the pumpkin deliciousness I'm surrounded by. Maybe some day soon though I'll be able to enjoy a slice of pumpkin pie...but for now I'm going to eat these:

    Pumpkin Chocolate Chip Cookies

    Yield: the recipe says 6 dozen..but I got more like 3.5 since I make giant cookies
    Prep Time: about 20 minutes

    This is seriously so easy, so you have no excuse to not make these wonderful, delicious, scrumptious cookies! 


    Ingredients:

    1/2 cup butter
    1 1/2 cup sugar
    1 egg
    1 c. canned pumpkin*
    1 tsp. vanilla
    2 1/2 cup flour
    1 tsp. baking powder
    1 tsp. baking soda
    1/2 tsp. salt
    1 tsp. nutmeg*
    1 1/2 c. nuts (optional- I didn't use them this time)
    1 c. chocolate chips*

    *Modifications (I've never changed this recipe until this time- and they still turned out perfect!): I added the whole 15oz. can of Pumpkin because I hate having something like that left over..and who doesn't love more pumpkin..seriously. I also added a tsp. of cinnamon in addition to the nutmeg because, why not? And I tossed in the whole bag of chocolate chips...the more chocolate the better!

    Directions: Preheat over to 350 degrees

    1. Cream butter and sugar with mixer until fluffy.
    2. Beat in egg, pumpkin and vanilla


    3. In separate bowl mix together flour, baking powder, baking soda, salt, nutmeg, cinnamon.

    4. Add dry ingredients to creamed mixture and beat until combined.

    5. Add nuts and/or chocolate chips

    6. Place on greased (depending on your type of cookie sheet- I use a pan that doesn't require greasing) cookie sheet and bake for 15-17 minutes until bottoms are browned and edges have formed.

    7. ENJOY!!!!


    I seriously ate 3 of these while writing this..they're that good!


    Friday, September 21, 2012

    Breakfast on the Run

    More often than not we are never home to enjoy breakfast. Aaron especially seems to get the short end of this stick, as he often has to be at work by 6am and usually grabs something quick, but never fulfilling, to eat. So, in an effort to help him out on the mornings he has to leave ridiculously early I searched on my favorite website (you know the one) and found him something awesome. I tweaked the original recipe to add a little bit more of a kick. When we do South West in this house- we go BIG and BOLD!

    On the menu today:

    South West Breakfast Burritos (to-go!)

    Yield: approximately 10 burritos
    Prep Time: about 45 min-hour

    Ingredients:

    4 medium potatoes
    1 medium onion
    1 medium green pepper
    1 lb. Sausage (we used medium Italian)
    6-8 eggs
    1 cup shredded cheddar cheese
    Salt
    Pepper
    2 tsp Chipotle Hot Sauce*
    2 tsp Red Pepper Flakes*
    2 tsp Penzey's Southwest Seasoning*
    1 tsp Dried Chives
    1 package of flour tortillas (we used a ten pack and it was just enough!)

    *Aaron likes things pretty spicy, so he added in these seasonings- feel free to add or discard anything!


     Directions:

    1) First things first: wash, scrub, cleanse, bathe those potatoes.

    2) Chop the potatoes into cubes/slices..however you prefer. Mine ended up being all sorts of shapes because that's just how I roll. Set them aside.

    3) Heat a pan with some olive oil.

    4) Chop up your onion and green pepper. Saute until the onions are translucent.


    5) Add your potatoes to the pan with the onions and peppers. I didn't precook the potatoes. I just threw them right in and let them cook with the other ingredients. If you want to decrease your cooking time, feel free to boil those bad boys up a little bit before you begin sauteing.


    6) Add your seasonings (chipotle sauce, salt, pepper, red pepper flakes, southwest seasoning etc...) to the potatoes, onions and peppers. Cook until potatoes are done.

    7) Remove mixture from pan and set aside.

    8) Pan fry your sausage. I used the same pan as the veggies to get some of that flavor into the meat.

    9) In the meantime, crack your eggs into a large mixing bowl and beat. Add cheese and stir. I also added a little bit more chipotle sauce and southwest seasoning to the egg mixture just to give it more of a kick.

    10) When sausage is cooked, drain and set aside with veggies. Scramble the eggs in the same pan as the one you've been using. By now, it's well seasoned and will make for some delicious eggies!

    11) Once your eggs have cooked combine all of your ingredients together in separate bowls, or one big one; it doesn't really matter, it depends on what your preferred method for stuffing burritos is.

    12) Fill each of your flour tortillas, fold and place in saran wrap (if you are freezing them to use at a later date, like we did--otherwise, plate up and enjoy!). Once covered in saran wrap, place burrito inside tin foil to prevent moisture and freezer burn.
    Special Thanks to my hubby for helping out with this!

    13) To reheat simply uncover the burrito, place it in a microwave safe dish and microwave for 1 minute 10 seconds; flip then microwave again for 1 minute 10 seconds. Easy and ready to go when your hubby, (or you know, you yourself) has someplace to be and little time to eat!


    I hope you enjoy these as much as we did. I made them almost 3 weeks ago and they disappeared out of our freezer in about 2 weeks. I think I only ate one...the rest went to my hubby; he loved every bite.

    Tuesday, September 11, 2012

    A Family Tradition

    It's a rare occasion for my husband and I to share the same days off, especially lately. This past Sunday we were fortunate enough to have an entire day together, and I wasted no time convincing Aaron to make me crepes. This is one of those recipes that I do not attempt to make, it's always been "Aaron's recipe" and therefore, his duty to make them...and he loves it.
    According to Aaron, family breakfast was a Sunday morning tradition when he was growing up. Not every Sunday was designated 'crepe day', but the days that were were favorited by the entire family. Like Aaron, his dad was the one who made them, perfected them, and waited until everyone had eaten their share before enjoying his own. I experienced my first "family breakfast" at his parent's house about a year after we had started dating. I remember walking into the kitchen and Aaron's father was busy prepping and pulling all sorts of things from the fridge that I just had to try in my crepe. Before this day, I had never had a crepe, and I'm pretty sure I'd never even heard of them either. I was hooked. Like almost everything Aaron's dad has created in the kitchen, I craved crepes like you wouldn't believe. Anytime I was lucky enough to have breakfast with Aaron and his family, I tried my hardest to request crepes. As you can imagine, I was stoked when Aaron and I got married and we received our very own crepe pan and the recipe! Now, I'm just as excited to share it all with you.


     Aaron's Family Crepes:

    Ingredients:

    1 cup flour
    2 eggs
    1/4 teaspoon baking powder
    pinch of salt
    1 tablespoon oil
    1 teaspoon vanilla**
    1/2 teaspoon sugar
    milk (as needed)

    ** The only addition to the original recipe Aaron has made, at my request..because, well why not! Vanilla is excellent!


     Directions:

     Add flour, eggs, baking powder, salt, oil, vanilla and sugar into large mixing bowl and stir until thick. This next part is tricky! Add milk, just a few tablespoons at a time, until mixture is the right consistency...no lumps and runny like soup (it'll slide right off your mixing spoon).


    Pour just a little bit at a time to avoid making the batter too runny

    "Runny like soup" says the Chef.


    Make sure you are using a flat,thin pan, otherwise the crepes will not form correctly.


    Make sure you grease your pan!


    Checking to see how greasy the pan is. He's adorable.


    Swirling the batter in the pan helps to spread out the batter and create edges.


    It'll take a few tries at this to make the mixture 'perfect,' each time you'll begin to eye-ball the batter and you'll know once you pour it into the pan and swirl it around if the batter is too thick, or too thin.


    TIP: When you're crepe is cooked, adding a little butter to the top and letting it melt helps to add a little bit more flavor!

    Once you've made your crepe, filling it is the best part.


    Using a fork like this helps to roll the crepe. Just place and twirl clock-wise.

    The final, delicious product! YUMMY!


    Tuesday, September 4, 2012

    Baking with a 3 year old

    Meet Charlotte- one of my favorite toddlers on the face of this Earth. She's 3, loves puppies, princesses and helping out in the kitchen. She's also the one who deemed me "Lee Lee" about a year/year and a half ago before she could say "Julie." (My heart still breaks when she says my actual name now, since for so long I answered to "Lee Lee" when I was with her..and her mom!) She spent most of the morning/afternoon with Aaron and I while her mom (my friend Candi who I've previously mentioned) snuck away to get some work done...look to the bottom of this post to see what I mean!! I didn't plan on baking- but I was dying to try out this new recipe I just found...yes, yes..on Pinterest. I think from now on that will just be a given!

    On the menu today: Buttermilk Blueberry Breakfast Cake
    As found on http://www.alexandracooks.com/ (her pictures are totally better than mine, as I was not showed and my hair was a complete mess...and she has a better camera! haha)

    I'm not a huge fan of blueberries, but I can dig them when they're cooked/baked in something. I was also hoping that the lemon zest would take away that "blueberry" taste. Turns out- I LOVED this recipe and everything about it! Except that by the time I got around to making it it was more like lunch-time. I hadn't eaten yet so it was still technically "breakfast cake" ;)

    Here's your list of ingredients:  

    Charlotte and Lee Lee baking away! :)
    ½ cup unsalted butter, room temperature
    2 tsp. lemon zest or more — zest from 1 large lemon
    7/8 cup* + 1 tablespoon sugar**
    1 egg, room temperature
    1 tsp. vanilla
    2 cups flour
    2 tsp. baking powder
    1 tsp. kosher salt
    2 cups fresh blueberries (I totally used frozen, but defrosted them before adding to the bowl)
    ½ cup buttermilk

    * 7/8 cup = 3/4 cup + 2 tablespoons (who says "I need 7/8 of a cup" anymore?)
    ** This 1 tablespoon is for sprinkling on top


    According to the original recipe's directions:

    1. Preheat the oven to 350ºF.

    2. Cream butter with lemon zest and 7/8 cup of the sugar until light and fluffy.
    Charlotte was very intrigued about "zesting" a lemon.
    2. Add the egg and vanilla and beat until combined.

    She was quite the egg crackin' pro, and insisted that I let her do this part..I'm brave, but in the end she needed help.
      Meanwhile, toss the blueberries with ¼ cup of flour, then whisk together the remaining flour, baking powder and salt. This was definitely Charlotte's job!


    3. Add the flour mixture to the batter a little at a time, alternating with the buttermilk. Fold in the blueberries.
    She was so great at holding the measuring cup so I could pour. On another note: YIKES! I've got some crazy hair!
    4. Grease a 9-inch square baking pan (or something similar) with butter or coat with non-stick spray. Spread batter into pan. Sprinkle batter with remaining tablespoon of sugar.

    Before. Charlotte loved the "pretty purple" color!

    5. Bake for 35 minutes. Check with a toothpick for "doneness." If necessary, return pan to oven for a couple of more minutes.
    (Note: The original recipe stated that "Baking for as long as 10 minutes more might be necessary"....however I ended up baking for 18 minutes past the original bake time..making that about 53 minutes..make sure you check it though to make sure you even need to do this when you make it.)

    6. Let cool at least 15 minutes before serving.


    After! Not too shabby!


    YUMMY!! 
    Charlotte, on the other hand, was not interested at all in trying this masterpiece...she was more interested in....


    Spending her afternoon reading books to my rabbit Han Solo. He loves it when Charlotte comes over to play!


    Side Note: If you are curious about the adorable knit dress Charlotte is wearing you'll never guess where it came from! Her mom is the most creative person I know and owns (with a friend of hers located in North Carolina) her own clothing shop for little girls and boys. If you are interested in learning more about some of the AMAZING things she makes and sells check out her website By Cee Cee. You can also find her on facebook! Here's just a few examples of my favorite things she's made:


    Charlotte's Strawberry Shortcake Halloween Outfit from last year!
    Aaron's Star Wars apron!
    Poppy Bubble Tank..freakin' adorable!


    Reversible Sunflower Dress
    Strip work skirt. I just love these colors together!! She has such an eye for fabric!


    Check out her work and support an amazing stay at home mom!